
Key takeaways
- Diapers (1 for every 1.5 to 2 hours out, plus 2 spares): Always account for unexpected delays or back-to-back wet diapers.
- Travel Baby Wipes: Choose fragrance-free, hypoallergenic water wipes in a secure flip-top pouch to prevent moisture loss.
- Portable Changing Mat: A wipe-clean, water-resistant pad shields your baby from unsanitary public restroom tables or grassy fields.
- Diaper Rash Cream: A travel-sized barrier ointment containing zinc oxide or petrolatum soothes irritation and prevents contact dermatitis.
- Disposal Bags: Odor-sealing, biodegradable bags contain dirty diapers and soiled wipes when trash receptacles are unavailable.
What's inside
Packing the right diaper bag essentials transforms unpredictable outings with your baby into smooth, stress-free adventures. A truly functional baby bag isn’t about stuffing every nursery item into bulky compartments; it centers on a streamlined checklist of sanitation supplies, backup apparel, feeding necessities, and soothing tools tailored to your infant’s developmental stage. When you organize your gear into dedicated zones—such as rapid-access blowout kits and temperature-controlled feeding pouches—you eliminate frantic searching during roadside emergencies or fussy meltdowns. Whether preparing for a quick grocery run or an all-day excursion, mastering this packing strategy guarantees you remain calm, clean, and completely prepared for any parenthood curveball.
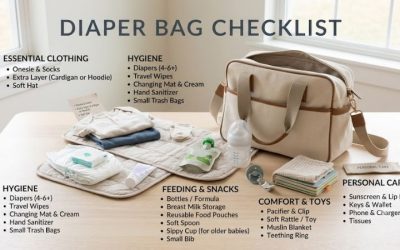
The Core Diaper Bag Essentials Checklist
Building a dependable baby kit requires separating non-negotiable hygiene items from optional accessories. Focusing on core categories like diapering supplies, emergency changes of clothes, and sterile feeding gear ensures you never run out of critical solutions during unexpected delays away from home.
1. Diapering and Hygiene Supplies
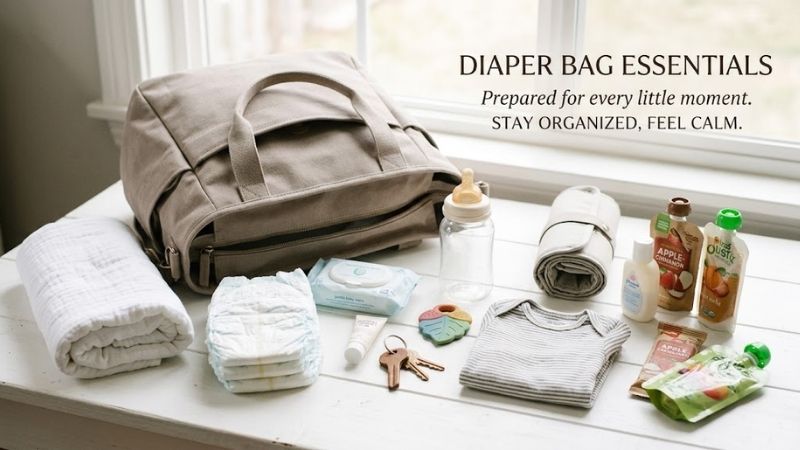
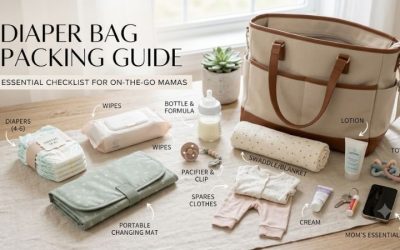
- Diapers (1 for every 1.5 to 2 hours out, plus 2 spares): Always account for unexpected delays or back-to-back wet diapers.
- Travel Baby Wipes: Choose fragrance-free, hypoallergenic water wipes in a secure flip-top pouch to prevent moisture loss.
- Portable Changing Mat: A wipe-clean, water-resistant pad shields your baby from unsanitary public restroom tables or grassy fields.
- Diaper Rash Cream: A travel-sized barrier ointment containing zinc oxide or petrolatum soothes irritation and prevents contact dermatitis.
- Disposal Bags: Odor-sealing, biodegradable bags contain dirty diapers and soiled wipes when trash receptacles are unavailable.
2. Spare Clothing and Mess Management
- Two Full Backup Outfits: Pack weather-appropriate onesies, stretchy pants, and socks to handle catastrophic blowouts or formula spills.
- Waterproof Wet/Dry Bag: A zippered polyurethane laminate (PUL) pouch isolates saturated clothing from the rest of your clean gear.
- Burp Cloths and Drool Bibs: Multi-layer organic cotton cloths protect your clothes and manage teething saliva or acid reflux.
3. Feeding and Hydration Gear
- Bottles & Measured Formula or Expressed Milk: Carry pre-sterilized bottles paired with pre-measured formula powder or an insulated breast milk cooler.
- Nursing Cover & Breast Pads (For Nursing Parents): Breathable muslin covers and absorbent disposable nursing pads handle unexpected letdowns.
- Sippy Cup & Toddler Snacks: For infants over 6 months, pack leak-proof straw cups, silicone snack catchers, and mess-free fruit purees.
4. Soothing and Health Essentials
- Extra Pacifiers in a Sanitary Case: Always carry two sanitized pacifiers with tether clips so dropped dummies do not contact dirty floors.
- Mini First-Aid & Grooming: Keep infant-safe pain relievers (with dosage syringe), saline nasal spray, adhesive bandages, and nail clippers.
- Compact Comfort Toy: A soft swaddle blanket, crinkle toy, or silicone teether redirects infant fussiness during long transitions.
5. Parent Essentials
- Hand Sanitizer: Alcohol-based rub (at least 60% alcohol) ensures clean hands before feedings and after public diaper changes.
- Hydration & Snacks: A refillable insulated water bottle and high-protein snack bars maintain parent stamina.
- Dedicated Valuables Pocket: Store your smartphone, keys, wallet, and lip balm in an exterior zippered pocket for rapid reach.
Top Gear and Products to Complete Your Diaper Bag
Equipping your bag with field-tested accessories saves valuable minutes and avoids unhygienic mistakes on public surfaces. We reviewed four reliable market essentials across infant sanitization, mess containment, and bottle feeding to highlight indispensable gear that streamlines everyday family excursions.
1. Skip Hop Pronto Signature Portable Changing Mat
- Best For: Self-contained diapering station for quick public restroom changes.
- Key Features: Extra-wide wipe-clean changing mat with cushioned head pillow, translucent wipe case, front zipper pocket, and mesh pocket holding up to 4 large diapers.
- Pros:
- Unfolds smoothly with one hand while holding your baby with the other.
- Cushioned head pillow protects infant skulls on hard plastic commercial changing stations.
- Detaches from the main clutch so you can carry just the changing pad into compact stalls.
- Cons:
- The included plastic wipes case can let wipes dry out if not latched firmly.
- Holds a maximum of 4 diapers, limiting its use on full-day multi-child trips.
- Use Case: Road trip rest stops, airplane lavatories, and restaurant restrooms.
- Who It’s For: Parents who want an organized, grab-and-go changing clutch that slips into any tote or clips directly to a stroller.
2. Munchkin Arm & Hammer Diaper Bag Dispenser and Bags
- Best For: Odor-trapping soiled diaper disposal on the go.
- Key Features: Compact clip-on bag dispenser infused with baking soda, lavender scent, and includes 24 durable disposal bags with easy-tie handles.
- Pros:
- Natural baking soda and lavender scent neutralize strong diaper odors instantly.
- Carabiner clip hooks onto diaper bag zippers, stroller frames, or car headrests.
- Small footprint frees up valuable interior pocket volume.
- Cons:
- Thin plastic can snag or tear on rough outer twigs if used outdoors.
- Refill rolls must be purchased specifically to fit inside the cylindrical dispenser.
- Use Case: Containing blowout clothes and soiled diapers in cars, parks, or friends’ homes.
- Who It’s For: Caregivers who need a reliable odor containment system when immediate outdoor trash bins are unavailable.
3. Aquaphor Baby Healing Ointment (Travel Tube, 3 oz)
- Best For: Multi-purpose skin protection and rapid diaper rash relief.
- Key Features: 41% Petrolatum formulation enriched with panthenol and glycerin, preservative-free, fragrance-free, and packaged in a TSA-compliant squeeze tube.
- Pros:
- Multipurpose utility treats diaper rash, dry teething drool rash, and cracked parent hands.
- Squeeze-tube design eliminates germ transfer compared to open ointment tubs.
- Creates an impenetrable breathable moisture barrier over inflamed infant skin.
- Cons:
- Heavy ointment consistency requires careful hand wiping after application.
- Can leave greasy transfer marks on synthetic clothing fabrics if over-applied.
- Use Case: Post-change diaper skin defense and soothing windburned cheeks.
- Who It’s For: Parents seeking one pediatrician-recommended treatment that replaces multiple single-use skin ointments.
4. Dr. Brown’s Formula Dispenser & Snack Cup
- Best For: Mess-free travel formula feeding and toddler snacking.
- Key Features: Three-compartment design holding enough powder for three 9-ounce bottles, snap-on secure rotating lid, and a narrow pour spout.
- Pros:
- Precision pour spout directs powdered formula cleanly into narrow bottle openings.
- Secure friction-fit rotating lid prevents powder from leaking between chambers.
- Doubles as a toddler snack container for cheerios or fruit puffs later on.
- Cons:
- Rotating top can feel stiff to twist with wet or lotion-covered hands.
- Compartments do not fit oversized scoops from specialty high-calorie infant formulas.
- Use Case: Preparing instantaneous bottles during flights, road travel, or doctor waiting rooms.
- Who It’s For: Formula-feeding parents wanting to eliminate bulky whole formula cans and messy roadside powder scoops.
How to Choose Your Diaper Bag Essentials: Buyer’s Guide
Curating baby travel gear requires balancing packable weight against daily preparedness. Evaluating materials, sizing, and multi-functional capability prevents overpacking heavy duplicates while keeping you fully armed for blowouts, feeding times, and weather changes across any afternoon journey.
1. Multi-Functional vs. Single-Purpose Items
- What: Selecting items that perform two or more distinct nursery jobs (such as muslin swaddles that act as nursing covers, stroller sunshades, and burp cloths).
- Why: Packing individual tools for every theoretical parenting scenario produces a dangerously heavy bag that causes severe shoulder strain.
- Who: Vital for urban walking parents, commuters, and parents carrying their child in ergonomic baby carriers.
- Trade-off: Multi-use items may sacrifice specialized performance (e.g., a muslin wrap shields sun but lacks the thermal barrier of a dedicated rain cover).
2. Dispenser Size and Packaging Footprint
- What: Choosing travel-sized tubes, refillable wipe pouches, and portioned powder dispensers over full-sized retail packages.
- Why: Full wipe packs (100+ sheets) and large ointment tubs add 2 to 3 pounds of unnecessary ballast to your daily load.
- Who: Essential for daily errands lasting under four hours and minimal diaper backpack setups.
- Trade-off: Travel containers require vigilant restocking every evening to avoid running out of wipes mid-outing.
3. Barrier Materials and Sanitary Enclosures
- What: High-density wipe-clean nylon, EVA changing surfaces, and waterproof PUL fabrics for messy supply containment.
- Why: Leaks from open diaper creams, soiled outfits, or damp pacifiers can contaminate sterile bottles and harbor bacteria inside dark bags.
- Who: Indispensable for all families navigating public spaces, daycares, and changing restrooms.
- Trade-off: Waterproof coated textiles can add stiffness and reduce flexible packing volume compared to relaxed canvas pouches.
Step-by-Step Guide: How to Pack a Diaper Bag Efficiently
A chaotic bag makes locating an urgent pacifier or diaper wipe an exhausting ordeal. Following a structured packing system keeps weight balanced on your shoulders, isolates sanitary gear from dirty items, and enables instant one-handed extraction when soothing a crying baby in public settings.
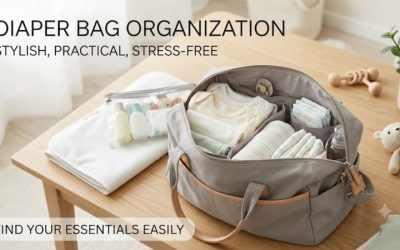
- Establish the Bottom Weight Anchor: Place heavy, non-immediate items at the bottom of your bag’s main compartment. Pack your secondary backup outfit, spare blanket, and extra unopened wipes here to anchor the bag’s center of gravity against your lower back.
- Set Up the Rapid Diaper Changing Zone: Position your changing clutch, current wipe pouch, 4 diapers, and ointment in an upper slip pocket or dedicated top compartment. You should be able to grab these items with one hand in under five seconds.
- Isolate the Feeding Station: Store prepared bottles, water cups, and formula dispensers inside insulated thermal pockets. Keep feeding gear strictly separated from diaper disposal items to maintain optimal sanitary conditions.
- Prepare the Emergency Wet Compartment: Fold your empty waterproof wet bag flat against the interior back wall. If a blowout occurs, the soiled outfit immediately goes into this bag, preventing bacteria from reaching your bag’s interior lining.
- Secure the Parent Valuables on the Exterior: Place your house keys, credit cards, sanitizer, and smartphone into the exterior zippered pocket. This keeps you from rummaging through baby toys when paying for groceries or unlocking your front door.
Frequently Asked Questions About Diaper Bag Essentials
Parents often puzzle over how many spare diapers to carry, how to prevent leaking milk, or how to tailor gear for newborn versus toddler stages. Reviewing verified answers to these common parenting questions helps eliminate stressful guesswork and keeps your everyday bag lightweight, hygienic, and completely organized.
How many diapers should I keep in my diaper bag?
A reliable rule of thumb is one diaper for every two hours you plan to be away, plus two emergency backup diapers. For a typical four-hour trip, pack four to five diapers. For newborns who nurse frequently, pack one diaper per hour of planned excursion time.
What essentials should I change as my baby becomes a toddler?
Transition away from multiple swaddles, infant formula portions, and newborn onesies. Replace them with spill-proof straw cups, portable toddler snacks (pouches, crackers), flushable wipes, potty-training spare undergarments, and interactive board books or small coloring kits.
How do I prevent baby bottles from leaking inside my bag?
Ensure bottle collars are screwed down completely dry, and always utilize the protective travel sealing discs that fit between the nipple and collar. Place bottles upright in structured thermal pockets or inside an additional waterproof ziplock pouch.
Do I need a dedicated diaper bag, or can I use a regular backpack?
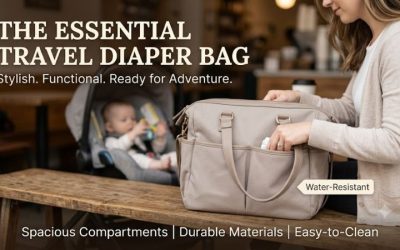
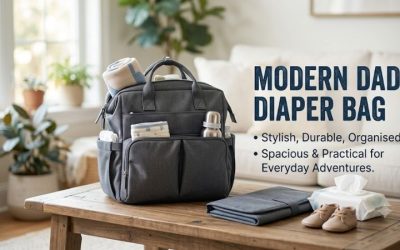
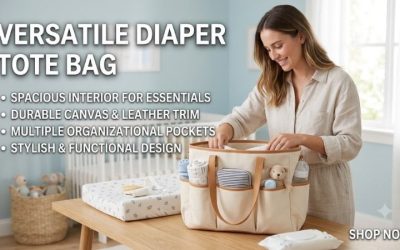
While a standard backpack can carry items, a dedicated diaper bag features integrated thermal insulation, water-resistant wipe-clean linings, stroller clips, and specialized pocket layouts that prevent supplies from disappearing into a chaotic bottom pile.
Summary
Mastering diaper bag essentials is about strategic readiness rather than overpacking. By stocking dependable hygiene supplies, organized feeding tools, and backup clothes in modular pouches, you conquer outings with confidence. Tailor your kit as your baby grows, and enjoy peaceful, well-prepared family journeys every day.
Write Your Review
No reviews yet. Be the first to share your experience!