
Key takeaways
- Never adjust, untie, or re-seat a sling while it is loaded.
- Do not exceed the lowest WLL in the complete system, including the rope, ring, connector, anchor, and lifting method.
- Do not confuse a whoopie sling with a lifting sling, fall-arrest lanyard, or personal climbing line.
- Do not use a ring with sharp edges, cracks, deformation, or an unknown rating.
- Do not shock-load the system by dropping, snatching, or suddenly stopping a limb.
- Do not use knots, bolts, tape, hose clamps, or heat to compensate for slipping.
- Do not store wet or dirty rope in a sealed bag; let it dry, then store it away from sunlight, chemicals, and rodents.
- Do not rely on a reference mark as a safety device. It only helps reveal movement during inspection.
A slipping ring sling is a serious rigging problem, not a minor adjustment. In tree work, a sling that creeps through its ring can lengthen unexpectedly, shift a load, or release hardware under shock loading. The result may be damaged bark, a dropped limb, damaged equipment, or severe injury. Before making any adjustment, lower the load, isolate the work area, and inspect every component.
This guide covers adjustable arborist rigging ring slings made with rope such as Tenex—not infant carriers or climbing harnesses. The goal is to find why the sling is slipping, correct the setup, and determine whether the sling is still safe to use in 2026. Always follow the sling and ring manufacturer’s instructions, and never exceed the marked working load limit (WLL).
As an Amazon Associate we earn from qualifying purchases at no extra cost to you. Product prices and availability are accurate as of the date shown and are subject to change.


What You Need
| Item | Why | Optional? |
|---|---|---|
| Manufacturer’s instructions and WLL information | Confirms the correct ring size, rope diameter, hitch method, and allowable load. | No |
| Clean work surface or tarp | Keeps dirt, grit, and sharp debris out of the rope fibers while you inspect and adjust it. | No |
| Gloves and eye protection | Protects your hands from rope fibers and eyes from debris or damaged strands. | No |
| Soft brush and mild soap | Removes grit that can prevent the rope from seating correctly in the ring. | Yes |
| Flexible tape measure and marker | Helps you record sling length and mark a reference point for detecting movement during a controlled, unloaded check. | Yes |
| Compatible replacement sling or ring | Needed if the rope, stitching, eye, or ring is worn, distorted, or incompatible. | Yes |
Replacement options vary widely by size and construction. As reference points, a Notch X-Rigging Ring Whoopie Sling with a 1/2-inch Tenex rope and 3-to-5-foot range is listed at $74.99, while a Rope Logic Ultra Ring Sling #3 with a 3/4-inch Tenex rope and 6-foot length is listed at $142.99. Expect comparable products to fall roughly in the $75-to-$145 range, but choose by WLL and application—not price alone.
Step-by-Step
1. Stop loading the sling (2–5 minutes)
Lower the suspended limb or equipment to the ground if you can do so safely. Keep people outside the potential drop zone and do not stand beneath a load while troubleshooting. If the load cannot be lowered without disturbing the sling, stop and have a qualified arborist establish a safe plan.
Do not try to “tighten” a slipping sling while it is carrying weight. A loaded ring can pinch fibers, and sudden release may cause the sling or load to move violently.
2. Identify the sling and intended configuration (5 minutes)
Read the label, tag, or manufacturer documentation. Confirm the rope diameter, ring size, adjustable length, intended hitch or choke configuration, and WLL. A 1/2-inch Tenex sling and a 3/4-inch Tenex sling are not interchangeable simply because both fit through a ring.
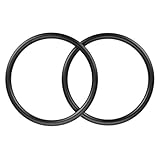
Check that the ring is designed for the rope and application. Do not substitute a hardware-store ring, welded eye, climbing connector, or lifting component with an unknown rating. A ring can look sound while having an unsuitable profile, edge radius, or strength rating.
3. Inspect the rope and eye (10 minutes)
Lay the unloaded sling straight on a clean surface. Look for glazing, melted or hardened fibers, cuts, flat spots, severe fuzzing, pulled strands, chemical damage, discoloration, and areas that feel unusually stiff or soft. Pay special attention to the section that contacts the ring and to the eye or splice.
Inspect the eye for pulled stitching, loosened strands, distortion, or evidence that it has been loaded over an edge. If you find core exposure, a cut, melted fibers, a damaged splice, or any manufacturer-defined retirement condition, remove the sling from service. Do not repair a structural rope sling with tape, knots, clamps, or household stitching.
4. Inspect, clean, and orient the ring (5–10 minutes)
Examine the ring for cracks, bends, flat spots, deep scratches, sharp edges, corrosion, and unusual wear where the rope bears. A ring that has become oval or has a rough groove can damage the rope and encourage movement.
Brush away grit and wash compatible rope and hardware only as directed by the manufacturer. Mild soap and clean water are generally preferable to solvents, bleach, or petroleum products, which can weaken synthetic fibers. Let all components dry completely before reassembly.
Orient the ring so the rope bears evenly around its smooth, rounded surface. Make sure the rope is not crossing itself, twisted, trapped under the eye, or riding over an edge.
5. Re-seat the sling correctly (5–10 minutes)
Follow the manufacturer’s illustrated method for passing the adjustable section through the ring. Pull the rope through gradually and keep the legs aligned. The standing part should lie smoothly against the ring, while the adjustable section should form the specified configuration without crossed fibers.
Do not add an improvised stopper knot unless the manufacturer specifically permits it and provides a method. A knot can reduce strength, prevent proper adjustment, or create a false sense of security. Likewise, do not use a carabiner, shackle, or second ring to “lock” the sling unless the complete setup has been approved for that purpose.
6. Set length and equalize the load (5 minutes)
Adjust the sling to the shortest practical length that provides the required connection. Ensure the load is centered and that the sling is not pulling sideways across the ring. Uneven angles can increase tension significantly: as the included angle widens, each sling leg carries more force.
Check that the sling is not bearing over bark spikes, a sharp branch union, a narrow metal edge, or another surface that can cut or pinch it. Use only manufacturer-approved protection where needed.
7. Perform a controlled unloaded check (5 minutes)
Before returning to work, place a small reference mark on the rope adjacent to the ring, using a removable marker if the manufacturer allows it. With no person beneath the load, apply only a light, controlled test load appropriate to the equipment and site. Watch for creeping, twisting, or uneven seating, then release the load and inspect the mark.
This is not a proof test and does not establish a new WLL. If the rope moves, the ring rotates abnormally, or you cannot verify the configuration, retire the sling or have a qualified professional inspect it.
Mistakes to Avoid
- Never adjust, untie, or re-seat a sling while it is loaded.
- Do not exceed the lowest WLL in the complete system, including the rope, ring, connector, anchor, and lifting method.
- Do not confuse a whoopie sling with a lifting sling, fall-arrest lanyard, or personal climbing line.
- Do not use a ring with sharp edges, cracks, deformation, or an unknown rating.
- Do not shock-load the system by dropping, snatching, or suddenly stopping a limb.
- Do not use knots, bolts, tape, hose clamps, or heat to compensate for slipping.
- Do not store wet or dirty rope in a sealed bag; let it dry, then store it away from sunlight, chemicals, and rodents.
- Do not rely on a reference mark as a safety device. It only helps reveal movement during inspection.
How Often
Inspect the sling before every use and after any overload, shock load, contact with a sharp edge, or unusual event. During extended work, pause whenever the load or anchor changes and recheck the ring, rope seating, and load path.
Clean the sling when dirt or sap builds up, and inspect it more frequently in wet, abrasive, salty, or chemically contaminated environments. Keep a simple log with the date, application, observed wear, and corrective action. Follow the manufacturer’s retirement schedule if one is provided; service life should never be based on appearance alone.
When to Call a Pro or Replace
Call a qualified arborist or rigging professional if the sling slips again after correct reassembly, if the load path is unclear, or if you cannot verify the ring and rope compatibility. Professional help is also appropriate for heavy or awkward loads, crane-assisted work, rigging near energized lines, and any setup where a failure could strike people, buildings, vehicles, or public areas.
Replace the sling immediately when there are cuts, melted or glazed fibers, core exposure, serious abrasion, chemical damage, pulled stitching, a damaged splice, a distorted ring, sharp edges, severe corrosion, missing identification, or an unknown loading history. Replace rather than “downgrade” a questionable sling. A lower intended load does not make damaged fibers or incompatible hardware safe.
FAQ
Why does a ring sling keep slipping?
Common causes include incorrect rope-to-ring compatibility, crossed or twisted rope, an improper configuration, contamination, side loading, insufficient seating, or a worn ring. Shock loading and excessive load angles can also make movement more likely.
Can I add a knot to stop the slipping?
Usually not. A knot changes the rope’s strength and may interfere with the intended ring-sling design. Use only the securing method specified by the manufacturer. If no approved method stops the movement, remove the sling from service.
Is a larger ring safer?
Not automatically. Ring geometry must match the rope, splice, load direction, and manufacturer’s instructions. A larger ring may change how the rope bears and can create an incompatible or weaker configuration.
Can I keep using it if the sling only slips under a light load?
No. Slipping under a light load is a warning that the setup is not reliably holding. Stop using it, inspect every component, and reconfigure or replace it before applying any working load.






Write Your Review
No reviews yet. Be the first to share your experience!