
Key takeaways
- Fixing the twist while walking or bending. An unstable carrier can allow a baby to slump or shift.
- Pulling only the tail end. This can tighten one rail while leaving dangerous slack elsewhere. Adjust the top, middle, and bottom sections separately.
- Wearing the rings at the neck. This concentrates pressure and encourages the shoulder fabric to roll.
- Leaving the shoulder bunched. Spread the fabric across several inches of your shoulder and upper back. Do not accept a thin, cord-like section.
- Covering the baby’s face. A hood, tail, or shoulder panel must never obstruct the nose and mouth.
- Using unapproved hardware. Do not replace a ring with a hardware-store ring, climbing ring, or lifting sling. Similar-looking parts can have different strength, finish, and geometry.
- Adding padding or altering seams. Home modifications can change how weight travels through the carrier and may void its safety rating.
A twisted ring-sling shoulder can make a comfortable carrier feel tight, lopsided, or difficult to adjust. Usually, the shoulder fabric has folded or rolled as it passes from your back toward the rings, creating pressure at your neck and reducing the sling’s ability to spread across your shoulder. If you try to fix it by pulling hard on the rings, you can tighten the pouch unevenly, leave slack behind the baby, or make it harder to check the baby’s airway.
The safest solution is to take the baby out, reset the fabric, and rethread or reposition the sling slowly. The steps below apply to a properly manufactured, weight-rated ring sling with securely attached rings. In 2026, always follow the carrier maker’s instructions first, because ring size, fabric width, and shoulder construction vary.
As an Amazon Associate we earn from qualifying purchases at no extra cost to you. Product prices and availability are accurate as of the date shown and are subject to change.


What You Need
| Item | Why | Optional? |
|---|---|---|
| Your ring sling and its instruction manual | Confirms the correct threading method, weight range, and approved positions. | No |
| A mirror or phone camera | Helps you see twists across your back and check that the shoulder fabric is spread. | Yes |
| A safe, flat surface or another adult | Provides a secure place to set the baby down while you reset the carrier. | Yes |
| A correctly sized replacement ring, only if approved by the manufacturer | A bent, cracked, or incorrectly sized ring must not be used. A 3-inch ring is common, but it is not universal. | Yes |
| Clean scissors for removing loose threads | Only for trimming a loose, harmless thread after inspection; never cut load-bearing stitching. | Yes |
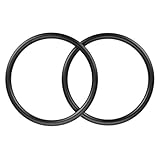
An accessory such as the Accmor Aluminium Baby Sling Ring, 3-inch, listed around $5.99, should be used only if your sling’s manufacturer specifically approves that size, material, and replacement method. Do not add rings to an unapproved carrier or use a ring that has scratches, bends, sharp edges, or visible damage.
A lifting product such as the Kennedy Wire Rope & Sling Co. 1-inch by 3-foot, 2-ply polyester lifting sling, listed around $24.99, is not a baby carrier component. It is designed for lifting equipment, not supporting a child, and must not be substituted for ring-sling fabric, shoulder padding, or a replacement part.
Step-by-Step
-
Take the baby out and identify the twist (2–3 minutes)
Move the baby to a safe sleep surface, play yard, or another adult’s arms. Never attempt a full rethreading while the baby is in the sling. Hold the empty carrier in front of you and locate the problem. A shoulder twist usually appears as fabric that rolls into a rope, crosses itself, or bunches near the neck instead of lying flat from the rings across your shoulder and upper back.
-
Loosen the sling completely (1–2 minutes)
Lift the fabric tail slightly through the rings to release tension. Loosen the top rail, middle section, and bottom rail separately rather than yanking the entire tail. If the fabric is locked between the rings, feed a small amount back through the top ring first, then pull it through the lower ring. Work with the sling empty until the layers are easy to see.
-
Remove the sling and lay it flat (2 minutes)
Place the sling on a clean bed or table with the wrong side facing up. Smooth the entire length from the rings to the opposite end. Separate the top edge, center, and bottom edge with your fingers. Look for a half-turn in the shoulder section, a fold hidden underneath another layer, or fabric that has wrapped around one ring instead of passing cleanly through both rings.
-
Untwist the shoulder fabric (3–5 minutes)
Starting at the rings, follow each edge of the shoulder fabric toward the opposite end. Keep the top edge on top and the bottom edge on the bottom. If the fabric is twisted, rotate the affected section in the opposite direction while maintaining the fabric’s natural flat alignment. Do not knot, sew, pin, or tuck the twist into the shoulder seam. A properly corrected shoulder should spread broadly instead of forming a narrow cord.
-
Check the ring threading (2–3 minutes)
Most ring slings are threaded by bringing the tail through both rings, then passing it back over the first ring and through the second. The tail should lie flat, with no crossed sections, and the adjustment should work when you pull one edge at a time. Use your manual if your sling uses a different design. Pull gently on the top, center, and bottom edges to confirm that each section slides independently.
-
Put the sling on with the rings correctly placed (2–3 minutes)
Place the rings high on your chest, near the collarbone and slightly forward of the shoulder joint—not at the back of your neck and not directly on top of your shoulder. Spread the shoulder fabric over the rounded part of your shoulder and across your upper back. Keep the edges visible and untwisted. The fabric should create a wide panel, not a strap digging into one spot.
-
Create a pouch before placing the baby inside (2 minutes)
Make a deep, hammock-like seat by pulling the lower edge across your body and gathering excess fabric toward the rings. The bottom edge should sit around your waist or slightly above it, depending on the carrier design. Keep enough room for the baby’s legs to form an ergonomic “M” position, with knees higher than the bottom. Do not make a loose pouch that allows the baby to slump.
-
Place the baby and tighten in sections (3–5 minutes)
Support the baby’s body as you lower them into the pouch. Pull the bottom edge up between the baby’s legs and across the lower back, then tighten the top edge and center section one at a time. The baby should be high enough to kiss easily, with the face visible, chin lifted off the chest, and nose and mouth uncovered. The panel should support the baby from knee to knee without covering the face.
-
Perform a final safety check (1 minute)
Use the TICKS principles: keep the baby tight enough to remain upright, in view at all times, close enough to kiss, with the chin off the chest, and with a supported back. Walk slowly for a minute and check whether the shoulder stays flat. If the fabric rolls again, remove the baby and repeat the reset rather than compensating by tightening harder.
Mistakes to Avoid
- Fixing the twist while walking or bending. An unstable carrier can allow a baby to slump or shift.
- Pulling only the tail end. This can tighten one rail while leaving dangerous slack elsewhere. Adjust the top, middle, and bottom sections separately.
- Wearing the rings at the neck. This concentrates pressure and encourages the shoulder fabric to roll.
- Leaving the shoulder bunched. Spread the fabric across several inches of your shoulder and upper back. Do not accept a thin, cord-like section.
- Covering the baby’s face. A hood, tail, or shoulder panel must never obstruct the nose and mouth.
- Using unapproved hardware. Do not replace a ring with a hardware-store ring, climbing ring, or lifting sling. Similar-looking parts can have different strength, finish, and geometry.
- Adding padding or altering seams. Home modifications can change how weight travels through the carrier and may void its safety rating.
How Often
Check the shoulder alignment every time you put the sling on, especially after washing, storage, or switching shoulders. Do a more careful inspection weekly if you use the carrier daily, and monthly if you use it occasionally. Wash and dry it only as directed; shrinkage or stiffness can make twisting more likely. Before every use, inspect the rings, stitching, fabric, and label. A quick adjustment may take less than a minute once you recognize the correct flat position.
When to Call a Pro or Replace
Stop using the sling and contact the manufacturer or a certified babywearing educator if you cannot remove the twist, the fabric keeps rolling, or you are unsure whether the carrier is threaded correctly. Have a professional check the fit if the baby repeatedly slumps, the carrier causes pain, or the rings move behind your shoulder.
Replace the carrier if you find torn fabric, pulled or broken stitching, stretched seams, fraying that reaches load-bearing areas, a bent or cracked ring, sharp edges, chemical damage, mildew, or an unreadable safety label. Do not repair structural damage with household thread, glue, tape, or a sewing machine unless the manufacturer provides an approved repair process. When in doubt, retire the sling.
FAQ
Why does my ring-sling shoulder keep twisting?
Common causes include putting the sling on with the fabric already rotated, leaving the shoulder bunched, placing the rings too far back, or tightening the whole tail at once. Reset the empty sling on a flat surface and follow each fabric edge from the rings outward.
Should the shoulder fabric be folded or spread?
It should be spread broadly across the shoulder and upper back, unless your manufacturer specifically describes a structured shoulder style. It should not press into your neck, form a rope, or have hidden crossed layers.
Can I use a larger or smaller ring to solve the problem?
No. Ring size affects friction and adjustability, and changing it may compromise the carrier. Use only the size and material approved for your exact model. A replacement ring is not a universal fix for a twisted shoulder.
Can I carry a newborn while troubleshooting the sling?
Only after the sling is fully reset and you can verify the baby’s airway, upright position, visible face, supported back, and knee-to-knee seat. For a first use or a persistent fit problem, have an experienced babywearing educator observe you.





Write Your Review
No reviews yet. Be the first to share your experience!